Showing posts with label Holidays. Show all posts

Tuesday, March 13, 2018

St. Patrick's Day Treats!


So, another holiday is coming up: St. Patrick’s Day. It’s a day to celebrate the most commonly recognized patron saint of Ireland. When I was growing up, I always assumed that only people of Irish descent celebrated it, but people who aren’t Irish celebrate it as well. It’s a great excuse to make a corned beef dinner, eh? ;)

My children happen to be Irish, through their father, but we’ve never made a huge deal out of the day. However, I was thinking of some special little things I could do for them and of course, food came to mind. ;) Here are three little recipes you can make for your family: Mint Chocolate Chip Shakes for the kidlets; Crème de Menthe Parfaits for the grown ups; and a simple dish for the whole family based on a recipe I found on Pinterest, easy and a great recipe to involve the kids with: White Chocolate Mint Leprechaun Pudding.

So, let’s get cooking!


For the shakes: Measure out the ice cream and place in a blender with the milk; add the green food coloring if the ice cream is white. Blend well. Pour into 2 cups and top with whipped cream and green sugar.

Mint Chocolate Chip Shake
(makes 2 servings)

2 c mint chocolate chip ice cream
1 c milk
2-3 drops green food coloring
(if using white ice cream)
Whipped cream
Green sugar


For the parfaits: Pour out a little crème de menthe into the parfait glass, about 2 Tbl. Place a nice heaping scoop or 2 of the vanilla bean ice cream in the glass. Pour on top more of the crème de menthe so it dribbles down the sides of the ice cream. Add another 1 or 2 scoops ice cream and a little more crème de menthe. Top with whipped cream. Sprinkle with some green sugar and add a sprig of mint leaves.

Crème de Menthe Parfait

Real vanilla bean ice cream
Crème de menthe liqueur
Whipped cream
Sprig of mint leaves
Green sugar


For the pudding: Pour the milk into a bowl and add the pudding mix. Beat with a wire whisk until smooth and thickened, about 2 minutes. Add the mint extract and green food coloring and blend in thoroughly. Layer the pudding into the cups, bowls, or whatever you’ve chosen, adding a handful of Lucky Charms cereal, then another layer in the same manner. Top with whipped cream and green sugar.

White Chocolate Mint Leprechaun Pudding
(makes about 3 servings)

1 box white chocolate instant pudding mix
1 ¾ c milk
½ tsp pure mint extract
2-3 drops green food coloring
Approx. 1 ½ c Lucky Charms
Whipped cream
Green sugar

Enjoy! ~TMMF

Friday, November 27, 2015

Brownie Protein Truffles


The holidays are upon us, and with all the parties, gatherings, and special occasions, most of us are going to be cooking and baking like nobody’s business. This recipe is not only easy and fun to make with the kids, it’s also a healthy snack for a holiday to-do amongst all the fat-laden, empty calorie goodies out there.

This no-bake recipe is from Busy But Healthy, and it’s pretty adaptable to suit your family’s dietary needs. It uses whey protein powder, but soy protein powder stands in perfectly fine. The nuts and dried fruit possibilities are endless with this one, and make for some interesting combinations.

My daughter and I used peanuts, almonds, cashews, raisins, dried cranberries, dried cherries, peanut butter chips, and chocolate chips. In order to make this an affordable recipe for our family, we purchased a 5 oz package of Great Value Dried Mixed Berries for $2.98. It had cranberries, cherries, and blueberries. We also bought an 8 oz can of mixed nuts for $2.00. If you’ve ever looked at the bags of individual dried fruits, and the selection of nuts, you know how expensive they are. Doing it this way gave us a variety of fruits and nuts, saved us money, and gave us plenty left over for other recipes.

The kids loved this snack, and I just know you will too.

So, let’s get "cooking!"


Pick out a variety of nuts, dried fruits, chocolate chips, coconut, seeds, and seasonal cookie/cake decorations. Chop the nuts and larger dried fruits. My Chief Assistant, my daughter Megan, loved helping with this. She wanted to do all of the nuts, but then I wouldn’t have had much to do!

Mix together the dough for the truffles. It starts out looking like it’ll be too dry, but have faith, it does come together. ;-)

Scoop out using a 1 ¾ oz scoop.


We scooped a bunch out onto our cutting boards, then rolled them. We then took the balls of dough and rolled them into nuts or pressed dried fruits or chocolate chips into them, then rolled them into nuts.

Some combinations we made: cherry chocolate chip, cherry almond, and raisins and peanuts (like a Chunky candy  bar). Others we rolled in plain cashews or peanuts, and peanut butter chips. Oh, and we rolled some in assorted Christmas jimmies and sprinkles.

Place on parchment paper on a sheet pan. Store in a container in the fridge. If they make it that long. ;-)

Enjoy! ~TMMF

Brownie Protein Truffles
    (makes about 30)

1 c whey protein, chocolate
1/2 c baking cocoa
1 c natural peanut butter
1/2 c honey
2 Tbl milk

Nuts, dried fruits, coconut, chocolate chips, jimmies, seeds

Each unadorned Truffle has approx.: Calories: 49, Fat: 2.7 g, Saturated fat: 0.5 g, Carbs: 5 g, Sugar: 0.3 g, Sodium: 12 mg, Fiber: 1 g, Protein: 4 g.

Check out Nuts.com for some other healthy snacks and recipes for this holiday season, including vegan and gluten free.


Monday, November 9, 2015

Salted Caramel Candy Corn Bark


This recipe comes from I Heart Naptime. It could have been made for Halloween, but also during the Fall, especially with Thanksgiving coming up, it could be a nice treat to set out for gatherings. Since I always try to make recipes more affordable for the average family, I switched some ingredients out for others that were still suitable and yet cost less.

The original recipe called for a 16 oz bag of white Candiquik coating, which was $3.74, so I substituted a 12 oz bag of Wilton’s white candy melts, which was $2.47. The difference in weight didn’t matter; the price per ounce was still less for the Wilton’s and I had plenty of them left for another recipe, making it even more thrifty.

Also, the recipe called for an 11 oz bag of Kraft caramel bits, which were $2.86, so I bought an 11 oz bag of Kraft caramels for $2.00. They were individually wrapped, but get the kids cooking with you. Even a toddler can sit and unwrap them to help.

The original recipe also called for a bag of M&Ms candy corn, which are white chocolate inside. I purchased a bag of M&Ms that were all yellow, orange, and brown and used those instead. I wanted the chocolate flavor because it would go well with the caramel. Doing it my way saved $2.13, and I had plenty of the candy melts and M&Ms left for another recipe I made, plus leftover caramels and the rest of the pretzels for the kids.

So, let’s get cooking!


Put parchment paper on a sheet pan. Line up the waffle pretzels. Melt the Kraft caramels in a saucepan on low heat, stirring frequently to help melt and prevent burning.

Spread the melted caramel over the pretzels.


While the caramel is cooling on that, use a double boiler to melt the candy melts. I just rigged up two pots that could go together with enough space in between and added some water to the bottom pot.

Spread the melted white chocolate over the caramel. I did half and then my lovely daughter Megan helped me press the M&Ms into the melted chocolate. This is another fun step for the kids, a great job for little hands.

I did half at a time because I didn’t want the melted chocolate setting up too firmly for the M&Ms to press in. Let it cool completely and cut with a knife to break up into pieces.

And you’re done! Enjoy! ~TMMF


Salted Caramel Candy Corn Bark

1 bag waffle pretzels
1 11 oz bag Kraft caramels
1 12 oz bag Wilton candy melts, white
1 bag M&Ms, Fall colors


Wednesday, October 28, 2015

Apple Smiles and Zombie Heads


I don't "do" Halloween, but I know many others who do, and since I love cooking with my kids and also doing crafts with them, I decided to post something for the season, starring my main assistant chef, Megan.

Here are two very easy and very cute Halloween treats you can make with your younger children for a Halloween party or just to enjoy. Older kids will enjoy making them also, but these two are particularly great for the younger kids, and snacking on them after is always fun. They also didn't break the bank to make, which is always one of my goals.

So let’s get to it!


First, the Apple Smiles. You’ll need apples, peanut butter, and mini marshmallows. The first two steps are for the adult or older child: quarter the apple and cut out the seeds. Slice each quarter into fourths.

To make the smiles, spread peanut butter on two slices of apple. Fix 5 mini marshmallows onto one slice, standing up, not lying down. Place another peanut buttered apple slice on top. Easy, right? And so much fun to make!


Here’s my lovely assistant, my daughter Megan, who has Down syndrome, making Apple Smiles with me. At first she was laying the marshmallows on their sides, but then I showed her how to make them stand up. You can see how happy she was afterwards to show off what we made.

Now for the Zombie Heads. You’ll need a bag of white Candy Melts (Wilton), food coloring, white yogurt covered pretzels, and decorations. We used pearl gems, Halloween M&Ms, and those tiny colored ball sprinkles. Use whatever you have on hand.


Melt about 25 or so of the Candy Melts in a double boiler or in the microwave. Then place about 2-3 tablespoons worth in a small bowl and add food coloring. We did the different colors one at a time because if we did them all at once, they would harden and have to be melted again. So here you see the blue we used first.

With a butter knife, spread a little of the colored mixture into the top two wells of the pretzel. These are the eyes, with the bottom being the gaping mouth.

Add decorations in the middle of the colored eyes, to be the eyeballs. Press them down slightly to hold them there.


Here is my lovely assistant Megan again, making Zombie Heads with me. And showing off the finished product. She really was happy, but the photo with her smiling real big was blurry! ;-)

So there you go, two easy treats to make together for a time of  fun and making memories with your children. I hope you enjoy making them as much as Megan and I did.


Monday, December 15, 2014

Cranberry Upside Down Cake


Cranberry Upside Down Cake? Wait, isn’t pineapple the fruit in an upside down cake??

No, with this holiday cake, it’s cranberries. This recipe is from Simply Recipes. I wanted to try it because it was different from the usual pineapple in an upside down cake, and it reminded me of something my Grammie would make. She made homemade whole berry cranberry sauce at the holidays, which always seemed so much more special than the canned. I think she would have liked this cake. I hope you will too, and that you make a wonderful holiday memory with it.

So, let’s get cooking!


In a small saucepan, melt the ¼ c butter with the brown sugar. Grease the 9” cake pan with butter. The pan has to be at least 2 inches high. This is important.

Pour the butter/brown sugar mixture into the pan and spread evenly. After you’ve sorted through the cranberries (a great job for young kids to help with), spread them evenly in the cake pan.


In a smallish bowl, mix together the flour, baking powder, salt, and spices.

Zest the orange and set aside.

Now, in a mixing bowl, cream together the ½ c butter and the sugar.


Add the eggs and beat, then add the orange zest and sour cream and beat. You can alternate adding the dry ingredients and the milk, but, um, I just dumped both in the bowl and mixed them in. Sometimes I’m a rebel like that. ;)


Pour the batter into the cake pan, covering the cranberries. The recipe said to preheat the oven to 350° and then when you put the cake in the oven, turn it down to 325°. I did do it that way, because sometimes I’m obedient like that. ;)

Bake for about 55 minutes, until a knife inserted in the middle comes out clean. Let it cool on a rack for 10 minutes or so, and then loosen the cake edges with a knife. Place a cake holder or platter upside down on top, and flip over to get the cake out. Voilá! Enjoy! ~TMMF


Cranberry Upside Down Cake

¾  c brown sugar
¼ c butter
12 oz fresh or frozen cranberries
1 ¾  c flour
2 tsp baking powder
½  tsp salt
½ tsp ginger
¼ tsp cinnamon
1/8 tsp ground cloves
1 ½ c sugar
½ c butter
3 large eggs
1 Tbl orange zest
½ c sour cream
¼ c milk

Thursday, February 13, 2014

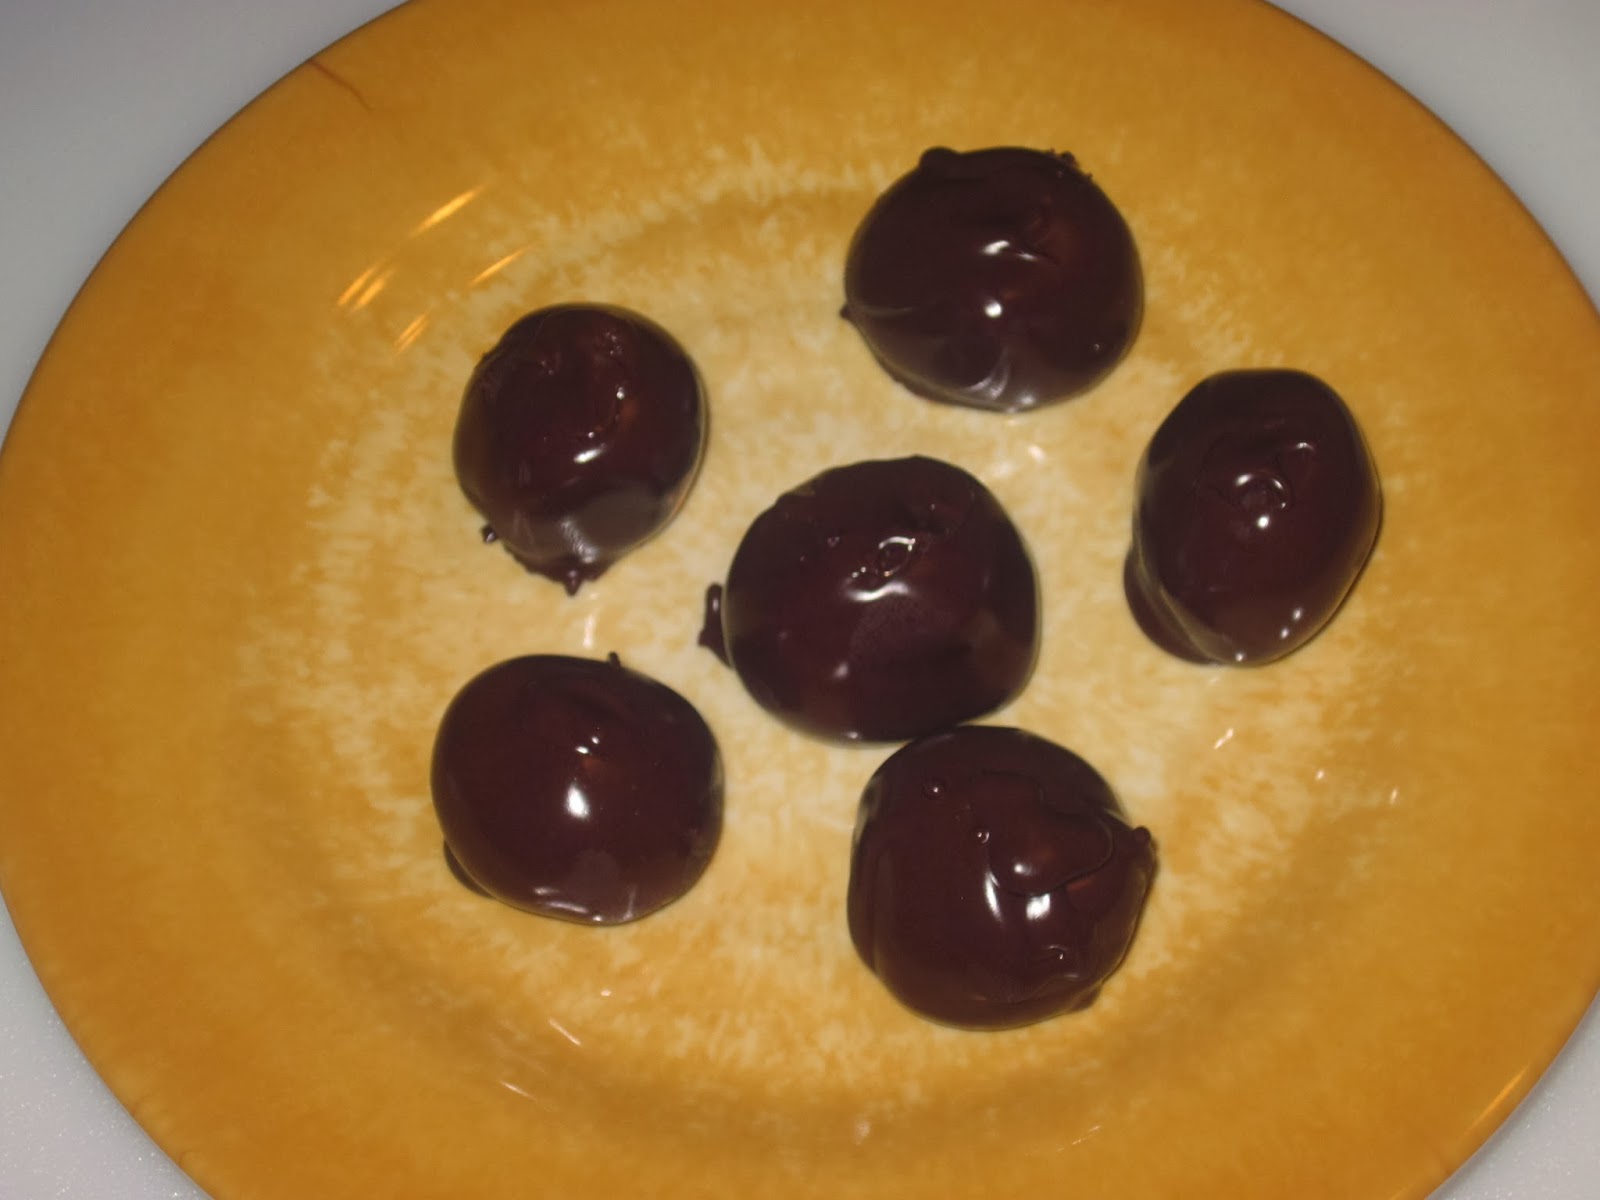
Reese's Peanut Butter Balls


So, Valentine’s Day is almost upon us, and according to the Greeting Card Association, it’s the 2nd biggest holiday for cards. For candy sales, Valentine’s Day is the 4th leader. Not as impressive, but $950 million is a pretty hefty sum. When I was growing up, my mom used to make these Reese’s Peanut Butter Balls, and when I had a family of my own, they became a recipe that I made frequently at Valentine’s Day. When I had paper routes, when my daughters were young, I sometimes made them also for the staff at the newspaper office, and they were popular!

I have to admit, they really are so good, and even though I don’t eat a lot of sweets, I can’t help but scarfing a few when I make these! They rival their commercial counterpart in taste and quality. The only adjustment I’ve made to the recipe my mom used is using natural peanut butter, which I prefer for any peanut butter use anyway. Do not be fooled by some of the new “natural” peanut butters in the average grocery stores; read the labels and you’ll see that they have sugar and other ingredients that are not different than regular peanut butters. I use Smuckers Natural Peanut Butter almost exclusively; the only ingredients are peanuts and salt. Because I have found that using a true natural peanut butter with only peanuts and salt as ingredients makes for the best flavor in these treats, that is what I list for the recipe and what I recommend. Take my experience in this matter and use it. If you can‘t trust the lady with the wand in a cooking matter, who can you trust? ;)


So, first measure out your peanut butter and place in a bowl with the softened butter.


Using a mixer, beat together well, making sure there are no lumps.


Add the confectioner’s sugar and mix well using a strong wooden spoon.


Using a 1 oz. scoop, measure out the mixture….


….and roll into balls, placing on a platter or sheet pan. Refrigerate for half an hour or so.


Meanwhile, in a double boiler, melt the chocolate chips and the wax until smooth. If you don’t have a double boiler, do what I do: use a saucepan on top that is slightly smaller than the pot on the bottom. Fill the bottom pot with enough water to boil but not touch the bottom of the smaller top pot. When the water comes to a boil, lower heat so it keeps to a low boil. Keep stirring the wax and chocolate.


A little bit of information here: you’re using paraffin wax to make the chocolate coating of the candy shiny and able to be handled without just melting from the touch of  your hot little hands. ;) This is what some commercial chocolatiers do.The amount of wax you use can also be individual. When making this recipe, I’ve used as little as ¼ bar and as much as ½ bar (the original measure in the recipe). The amount I came to prefer for keeping melting at bay but keeping it from feeling like you’re chewing a wad of waxy chocolate is about a scant 1/3 bar.


So, using a toothpick poked into the middle of each peanut butter ball, dip them into the melted chocolate/wax mixture.


There will be a small area at the top with no chocolate on it; after they are all dipped, I simply dip a spoon into the melted chocolate/wax mixture and touch the tip of it to the “un-chocolated” spot to cover. You may have to reheat the chocolate/wax mixture as needed.


Serve to your family in whatever way you wish. They can be simply placed on a dish to enjoy, or put in a box or other container. Here is a special heart shaped box (that I made) that you might like to make to showcase them so sweetly: Do It Yourself Valentine's Box. Enjoy! ~TMMF


          Reese's Peanut Butter Balls

          2 c. natural peanut butter
             (Smuckers)
          1/2 c softened butter
          4 c confectioner's sugar (1 lb)
          1 12 oz bag semi-sweet chocolate chips
          1/3 bar parafin wax


Friday, March 29, 2013

Easter Bread


This recipe is for the bread my mom made at Easter every year when I was growing up. It was such a special treat and much looked forward to. Even the smell of it can take me back to those long ago Easters of my childhood, searching for the eggs we’d colored the day before, eating my mom’s wonderful Easter Bread with breakfast, scurrying to get ready for church. Such sweet memories. I hope you’ll enjoy this as much as I do.


First, set the yeast to soften in the water. I took the water warm from the tap and added the yeast in a bowl. Because you’re using less water and more yeast than typically, it will be thick. Just stir till all is moistened, then cover it with a towel and set aside.


While the yeast is softening, set the milk to scald in a small saucepan. In a small bowl, melt the butter in the microwave oven. Add the sugar, salt, and melted butter to the scalded milk and remove from heat, stirring until the sugar is completely dissolved. It needs to cool down somewhat now.


In a large mixing bowl, measure out the flour. When the milk mixture is cooled but still warm, add to the flour and stir with a wooden spoon to make a thick dough.


Add the softened yeast, vanilla, and beaten eggs. Beat with a mixer until smooth. It will make a looser, sticky dough, more like a batter. Just some advice here: don’t let the dough climb up the beaters. Keep the speed on medium, and if you have to, stop beating for a few seconds to scrape the batter down off the handles of the beaters before starting again. Now how would I know to warn you about this? ;)


Cover and let rise in a warm place until bubbly. I put my electric oven on 150° for a few minutes, shut it off, and place the covered bowl on a plate inside. It will take about 45 minutes for the rising.


Next, stir down with a wooden spoon. Put into a well greased bundt pan, angel food cake pan, or 10” tube pan. Cover again and let rise till doubled, about 45 minutes.

With the oven heated to 350°, bake for 25-30 minutes. Let cool about 10 minutes and remove from pan onto cooling rack.


While the bread is cooling, mix up some icing using 1 c. confectioner’s sugar and 3 tsp. milk. You want it to be smooth and just thin enough to run down the sides. After the bread is cooled, spread the icing on top, pushing it to the edges so it drips down the sides.


Now, traditionally, this is made with white icing and then tiny pastel colored non-pareils sprinkled on.  However, this year I decided to try something new. When I was done putting the white icing on, I made a little pink, purple, and yellow icings and drizzled them back and forth over the white. Serve and enjoy! ~TMMF

Easter Bread

¼ c. warm water
2 packages yeast
½ c. milk
1/3 c. sugar
1 tsp. salt
2/3 c. melted  butter
4 c. flour
1 ½ tsp. vanilla
4 eggs, beaten


Wednesday, March 13, 2013

Irish Soda Bread


With St. Patrick’s Day coming up, I thought I’d share this quick and easy recipe for Irish Soda Bread that my mom used to make when I was growing up. It’s so good, and just sweet enough to feel like it could be dessert. I like it in the morning with a nice cup of hot tea.


Add the vinegar to the milk, stir, and set aside for now.

Mix together the flour, sugar, salt, and baking soda. Add the raisins and caraway seeds and mix well.


Using a fork, beat the egg in a small bowl. Melt the butter in another bowl.


Add the egg, milk, and butter to the dry ingredients, stirring till just mixed. It will look lumpy, and that’s not just from the raisins. ;)

Pour the batter into a greased 9 x 13” baking dish. Smooth out so it’s all even.


Bake in a 350° oven for 25-30 minutes. I would seriously check it at 25 minutes, to be safe. It should be lightly browned on top, and edges pulled away from the sides of the baking dish. I probably could have taken mine out a few minutes before I did. Mea culpa. ;)


We usually just eat it plain, but you can serve it with butter if you’d like. Erin go braugh! as the Irish say.  Enjoy! ~TMMF

Irish Soda Bread

2 c. milk
2 Tbl. vinegar
4 c. flour
½ c. sugar
1 tsp. salt
2 tsp. baking soda
½ 12 oz. box raisins
1 Tbl. caraway seeds
1 egg
½ c. butter