Showing posts with label Side Dishes. Show all posts

Wednesday, August 12, 2015

Fiesta Ranch Chicken Pasta Salad


I love pasta salads, and I’ve tried many that are so good I eat them for breakfast. But this one is the absolute tippity-toppest of them all. Oh. My. Tongue. It disappeared too quickly, and I can’t wait to make more. We ate it for breakfast and lunch the next day.

This recipe came from Butter With a Side of Bread, and I didn’t change a heck of a lot with it. The original recipe had a can of kidney beans and a can of olives in it, both of which I didn’t use. I felt the can of black beans was plenty, and the olives would have been great, but I didn’t have any. I amped up the flavor and zip with a teaspoon of chili powder. I also discovered, after eating it, that this would have been just as great without the chicken in it, so that’s an option for me in the future. The black beans gave enough protein by themselves. I know you’ll like this one as much as my family did.

So, let’s get cooking!


Set a large pot of water to boil for your pasta. I used a fusilli for this, also known as rotini. Cook until al dente, drain, and rinse well with cold water to stop the cooking process.


In a skillet with a little oil, sauté the chicken breast. When done and cooled, cube into small pieces.


Grate the sharp cheddar cheese and set aside.


In a large mixing bowl, place the drained, cooled pasta, tomatoes, onions, peppers, cubed chicken, corn, and black beans.


For the dressing mixture, in a medium bowl, use a whisk to mix together the mayonnaise, milk, Hidden Valley Fiesta Dip mix, taco seasoning, and chili powder.


Add the cheddar cheese and dressing mixture and blend well. The original recipe added Fritos to the pasta salad, but I couldn't imagine adding something so crunchy to this. Add it if you'd like. ;)

It’s ready now. Enjoy! ~TMMF


Fiesta Ranch Chicken Pasta Salad

1 lb fusilli (rotini)
2-3 chicken breasts
1 Vidalia onion
1 green bell pepper
2 tomatoes
1 can corn, drained
1 can black beans, drained and rinsed
2 c grated sharp cheddar cheese
2 c mayonnaise
½ c milk
1 pkg Hidden Valley Fiesta Dip mix
½  pkg Taco Seasoning mix
1 tsp chili powder

Friday, August 7, 2015

Chicken Bacon Ranch Pasta Salad


This is one of those pasta salads that tastes so stinking good, you don’t want to stop eating it. I ate it for breakfast the next morning, it was that good. The original recipe, from Yellow Bliss Road, had peas in it, and for a cold salad, I knew that wouldn’t fly with my kids. So I 86ed the peas and added in some green and yellow bell peppers, red onion, and a clove of garlic for extra zip. I also added mayo with the Ranch dressing to mellow it out a little. This is definitely a keeper.

So, let’s get cooking!


Set a pot of water to boil on the stove for the pasta. I chose mini farfalle for this; it just seemed to go good. But choose whichever shape you’d like. Cook until al dente, drain,  and then rinse thoroughly with cold water.

If you haven’t got cooked chicken or bacon on hand (left over), now would be a good time to cook those, too. ;)

Mince the garlic, dice the green and yellow bell peppers, red onion, and the humongous tomato. Yeah, I know there’s no tomato in that pic. You’ll have to just imagine it. Go ahead, it’s good for you; it builds your creativity. ;)

Place the pasta and veggies in a large mixing bowl. Now see? You imagined those diced tomatoes right into that photo! I knew you could do it!


Dice the chicken breast into somewhat smallish chunks, and chop the bacon. Add it to the rest in the bowl, and mix in the Ranch dressing and mayonnaise. This is so good, I’m sure you’ll love it!

Enjoy! ~TMMF

Chicken Bacon Ranch Pasta Salad

3 c pasta
(I used mini farfalle)
2 c cooked chicken breast
6 slices cooked bacon
½ green bell pepper
½ yellow bell pepper
¼ lg red onion
1 clove garlic
1 humongous tomato
¾ c Ranch dressing
½ c mayonnaise


Monday, August 3, 2015

Deviled Egg Pasta Salad


This recipe combines two of my favorite things: deviled eggs and pasta salad. I have no idea why I never thought to combine them myself, but who cares? Now I have! ;) I did not stray very far from the original recipe, found on 52 Ways to Cook; I only left out the pickle brine and sweet relish, and added in hot mustard to give it some added zip. I think you’ll like it.

So, let’s get cooking!


Set a large pot of water to boil for the pasta. You can obviously use any kind you want, but I love using different pasta shapes, and for some reason cavatappi seemed to be the best for this salad. After cooking until just al dente, drain and rinse well with cold water all the way through.


While that is all happening behind the scenes, dice the celery and red onion.


Peel and chop the boiled eggs. If you haven’t got any on hand, you obviously need to get those done. I have a bowl full in the fridge usually, because the kids like to have one of two for a snack. I figure, they’re inexpensive and it’s protein. I’d rather have them eating a couple of boiled eggs than handfuls of dry cereal.


In a large bowl, put the drained cooled pasta, the celery and onions, and the mayo and yellow and brown mustards.


Mix well, and add the eggs, mixing in but not so much as to decimate them. ;)

Serve and enjoy! ~TMMF


Deviled Egg Pasta Salad

1 lb cavatappi
(or another shape)
3 stalks celery
½ med. red onion
8 hard boiled eggs
2 c mayonnaise
3 Tbl yellow mustard
2 Tbl hot brown mustard


Wednesday, July 15, 2015

Cheesy Confetti Pasta Salad


Okay, with Summer in full swing, I’ve been trying not to use the oven because the kitchen gets so stinking hot. So as I was browsing cold pasta recipes, I came upon one that I decided to make, only in the end I made up one myself. If I change a couple things around in a recipe, obviously I can’t claim that it’s my original recipe, but with this one it’s safe to say it’s mine.

The original recipe I was going to make used rotini pasta, red bell pepper, celery, onion, cheddar cheese chunks, and a sauce that was basically what you use to make cole slaw. I used mini farfalle pasta, 3 colored bell peppers, no celery, red onion, no chunks of cheese, and a bottle of Asiago peppercorn salad dressing. So yes, this one is mine! ;)

So, let’s get cooking!


Set a pot of water to boil for the pasta. Cook until al dente, then drain and rinse thoroughly with cold water to stop the cooking process.


In the meantime, you can dice the green, red, and yellow bell peppers and the red onion. I chose the red onion mostly because of the beautiful added color it would give to this side dish. Since the pasta is small, you’ll want to dice the veggies fairly small also. Peel and mince the garlic. Don’t skip the garlic; it really put this pasta salad over the top!


Put the cooled pasta and the veggies in a bowl.


Add the Asiago Peppercorn dressing and stir well.


And…..voilà!


Look at this delicious pasta salad just bursting with color and flavor! Enjoy! ~TMMF


Cheesy Confetti Pasta Salad

12 oz mini farfalle
½ green bell pepper
½ red bell pepper
½ yellow bell pepper
¼ lg red onion
1-2 cloves garlic
1 16 oz bottle Asiago
     peppercorn dressing
salt and pepper to taste

Friday, February 20, 2015

Spaghetti Squash Au Gratin


This is my second time working with spaghetti squash. I don’t know why I never tried it before, but the taste is so yummy, it makes me want to start experimenting with it on my own! This is a recipe I came across somewhere online; someone shared it on Facebook but the photo with recipe didn’t say who created the recipe. I don’t know who to give credit for it, so all I can say is I found it online. The only thing I changed was using fresh garlic instead of garlic salt.

Anyhoo, my daughter Megan, who has Down syndrome, helped me make this and just like last time, she loved scraping the “spaghetti” out of the squash. She actually scraped hers down more than mine and made a hole in the squash rind because of scraping it so thin! We enjoyed working together, and then loved this zippy recipe at supper.

So, let’s get cooking!


First, cut the spaghetti squash in half and scoop out the seeds. Then lay them upside down on a greased sheet pan. Bake at 400° for 30 minutes.

While the squash is baking, thinly slice the onion and then cut the slices into 3 or 4 pieces. Mince the garlic. I used my garlic press when it was time to add it.

In a skillet, melt the butter and sauté the onions, garlic, red pepper flakes, and salt and pepper. Adjust the red pepper flakes to your desired level of heat. ;) Cook until onions are tender.


When the spaghetti squash is done, turn over and let cool a little so you can handle it, or use a kitchen towel or pot holder. Use a fork to scrape out the “spaghetti.” The middle photo shows the difference after scraping out one (the half on the left). And on the right is the one Megan scraped just as well as she cleans a chicken bone! Clean as a whistle! ;)


So, you’ve scraped the squash into a bowl. Now add the sautéed onion mixture, the sour cream, and half the shredded cheddar cheese.

Mix well and pour into a 7 X 9” baking dish. Sprinkle the other half of the cheese on top.

Bake at 375° for 20-25 minutes. Enjoy! ~TMMF


Spaghetti Squash Au Gratin

1 spaghetti squash
1 small Vidalia onion
1 clove garlic
1 tsp red pepper flakes
Salt and pepper to taste
¾ c sour cream
1 c shredded cheddar cheese


Now, to announce the winner of the TMMF coffee mug in my give-away: Heidi Strawser!! I had pretty ecru colored cards made and embossed with the names of all who had entered, placed them in a luxuriously soft deep purple velvet bag with polished cherry wood handles gleaming in the sunlight, and had my Chief Assistant reach in and blindly choose one name.

Okay, so really I wrote the names on slips of paper that I tore off because I was too tired to go get the scissors. Then I put them in a used plastic grocery bag. But Megan really did blindly pick one name. That part is true. ;)

Congratulations Heidi!!


Monday, March 10, 2014

Crash Hot Potatoes


I found the recipe for Crash Hot Potatoes on the internet, but I have no idea who created it. This recipe is so easy to make, and one that the kids might like to help with, especially when it comes to using a potato masher to mash down the spuds on the sheet pan. And they are SO good!! I love potatoes, but there is something about potatoes that are somewhat crispy on the outside and soft inside, and bursting with flavor! Who cares about carbs; these are delicious!


So, the first thing you need to do is boil the little potatoes until they are just tender. Poke them with a fork or sharp knife in the middle to tell. Drain and set aside.


While the potatoes are cooking, you can grate the Parmesan or Asiago cheese and gather together the olive oil, garlic powder, salt, pepper, and fresh or dried herbs of your choice. I chose rosemary, which is wonderful on potatoes.


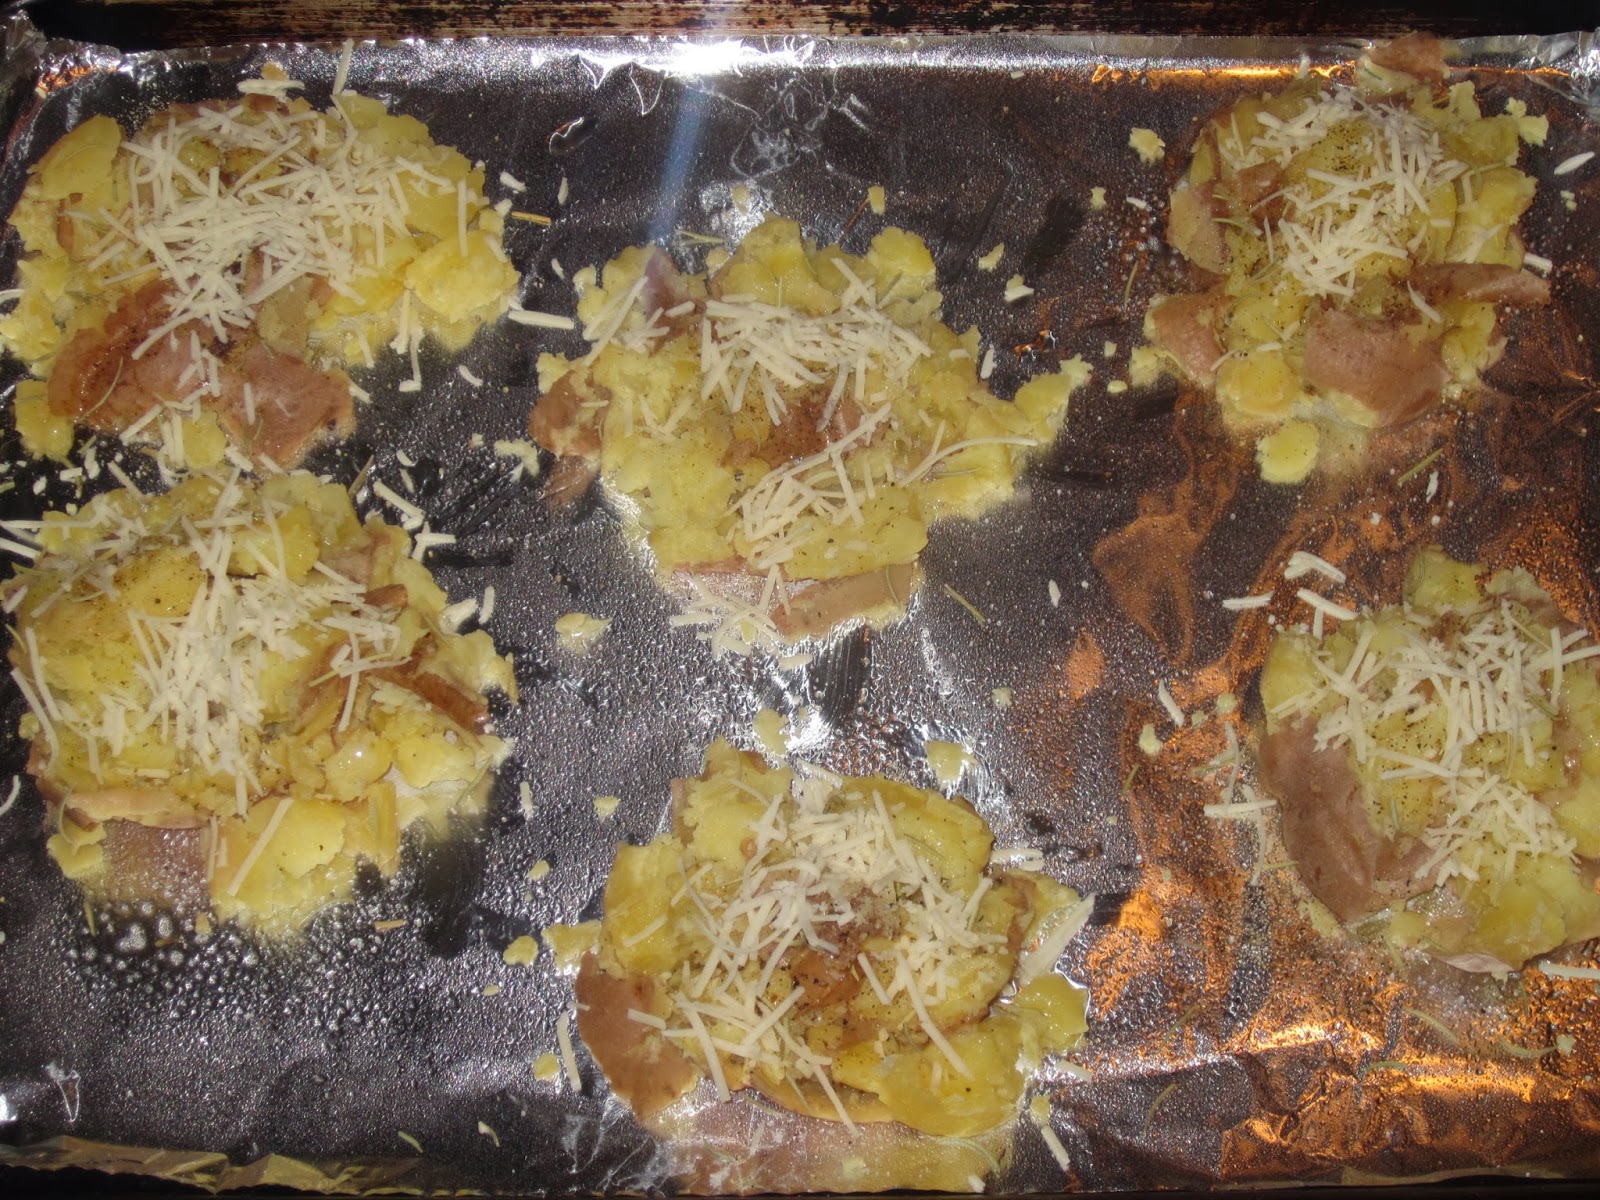
When the potatoes are ready, place on a greased sheet pan and smash down halfway with a potato masher, going one way once and the other way once, much like how you criss-cross peanut butter cookies with a fork.


Drizzle with the olive oil. Sprinkle on the salt, pepper, and garlic powder. Sprinkle on the herbs you have chosen.


Sprinkle with freshly grated Parmesan cheese or Asiago. I used Asiago on these, but when I make this recipe in the future, I am going to use both, and more. I love cheese! ;)


Bake for 20 minutes at 425°. They should be lightly browned on the edges and top, and the cheese nicely melted. Serve with sour cream if desired. Enjoy! ~TMMF

Crash Hot Potatoes

Baby potatoes
Olive oil
Garlic powder
Salt
Fresh ground pepper
Herbs of your choice
   (rosemary is great with these!)
Fresh Parmesan and/or Asiago cheese

Thursday, July 11, 2013

Rosemary Potatoes


Rosemary Potatoes are another childhood favorite of mine that my mom often made at home. I’m not sure if other children would have turned up their noses at this fragrant side dish, but my siblings and I loved it. I hope your family will too!


Scrub the potatoes well if you’re leaving the peels on them. You can peel them if you’d like; I can’t, therefore I leave them on for extra nutrition and fiber, as well as saving time. Slice them into wedges (cut in half, then each half into sixths or so) and rinse well to remove the excess starch.


Melt the butter in a small bowl using the microwave. Add the oil to it and mix.


Place the drained potato wedges in a large bowl. Drizzle the butter/oil mixture on the wedges and mix well to coat. It may solidify, but that’s okay. Sprinkle on the salt and pepper. Add the rosemary leaves, rubbing through your hands before releasing them into the bowl, and mix.


Spread on a sheet pan evenly and bake in a preheated 400° oven for 30-45 minutes, until toasty browned. You can turn them in between if you’d like, but I never do and they come out just fine. These go very well with a chicken meal, and they’re so easy. Enjoy! ~TMMF


Rosemary Potatoes

4-5 large potatoes, any kind
2 Tbl butter
1 Tbl oil
½ tsp salt
½ tsp pepper
1-2 Tbl dried whole rosemary

Thursday, April 18, 2013

Simply Delicious Cole Slaw


When I first made cole slaw, it was so creamy, I had to name it that. I never even liked cole slaw until I was an adult. However, once I did, for years, we would buy cole slaw from a local grocery store (YUCK!!) or a small local seafood restaurant that had the absolutely BEST whole belly fried clams, but blah cole slaw. Either way, the cole slaw we bought was limp, white, and vinegary.

However, KFC, which was the turning point for me and my love affair with cole slaw (theirs was actually what made me even like it!), was always so crisp and fresh tasting, and the sauce delicious. It was made a few times at my house, trying to recreate what I was tasting when I got it at KFC. I didn’t write down a recipe, so I just tried to wing it, using the ingredients I thought were used. It came up a hit. I believe this will be a hit with your family too.


First, after pulling off any outer leaves that are brown or withered, quarter the cabbage and cut out the core. Lay each quarter on a flat side and slice very thinly. Turn the pile of slices so the long side is horizontal, and chop finely.


Peel the carrot and grate. Add to the cabbage in a large mixing bowl..


In a medium mixing bowl, add the mayonnaise, vinegar, sugar, and celery seed. Mix thoroughly with a wire whisk.


Add to the cabbage and carrot, mixing to coat well. Refrigerate if you’re not serving right away. Yum yum! Enjoy! ~TMMF


                                                            Creamy Cole Slaw

                                                            1 small cabbage
                                                            1 large carrot
                                                            2 c. mayonnaise
                                                            ¼ c. white vinegar
                                                            1 Tbl. sugar
                                                            1 tsp. celery seed

*Note: Do not use celery salt.


Friday, April 12, 2013

Baked Beans


This is the easiest recipe for baked beans. If you’ve never made them before, or even if you have, this recipe is so good, you’ll get compliments for it, believe me. I believe that a big part of the reason why these are so good is because the recipe is simple. Most of my cooking follows the “KISS” method, short for Keep It Simple, Stupid. The minute you start throwing too many flavors together or try to make things complicated, that’s when things start to fall apart and the recipe will be a bust.

By the way, if you’re thinking of cutting down on fat and want to leave out the salt pork or bacon, don’t. Been there, done that, and it is not worth what you lose in taste. Maybe use a little less salt pork or bacon, or even better, cut down on the fat in the rest of the meal somehow. But do not take the fat totally out of this recipe.

So, let’s get cooking!


You’ll need to soften the navy beans, and you can do this one of two ways. The first is to soak the beans overnight, if you plan to cook them all day in a lower heat oven the next day for supper. The other way is to bring the beans to boil in 6-7 c. water for 2 minutes, turn off the heat, and set covered for an hour.

I set mine to soak the night before with 7 cups of water.


The next morning, this is how they looked, having absorbed water and therefore softened to a degree.


Chop the onion. Cut up the salt pork or bacon. I used bacon this time. I buy my bacon for cooking in a bulk package of 3 lbs. bacon ends and pieces. It costs me $6.98 at Wal-Mart and I get seven meals out of it. I split them up, package in ziploc sandwich bags, and freeze for use in meals, each approximately a half pound each.


Now, you’re going to layer all the ingredients in the bean pot, or a casserole dish if you don’t have a bean pot. I have my grandmother’s, which was her mother’s or grandmother’s. I’m not sure which, but at any rate, it’s old and means a lot to me.


Start by scooping beans out of the water they’ve been soaking in, with a slotted spoon, about three full spoonfuls, into the bean pot. Add 1/3 of the chopped onion and 1/3 of the sliced salt pork or bacon.


Repeat two more times, ending with salt pork or bacon. Add the brown sugar and molasses. Pour in the water from the previously soaking beans into the bean pot, almost up to the top.


Cover and put into a 325° oven for approximately 6 hours. Stir at least every hour, adding water as needed, from the bean water first and then just from the tap. For the last 2 hours, bake uncovered to brown. The juice will also thicken up. Enjoy! ~TMMF


Baked Beans

1 bag dry navy beans
1 large onion
½ lb. salt pork or bacon
3 Tbl. brown sugar
6 Tbl. molasses


*Note: You can also slow cook these through the night, setting the oven at 300°, as long as you know you'll be getting up at least 2 or 3 times during the night to stir.and add water. And just FYI, the crock pot is not a good idea for this dish.